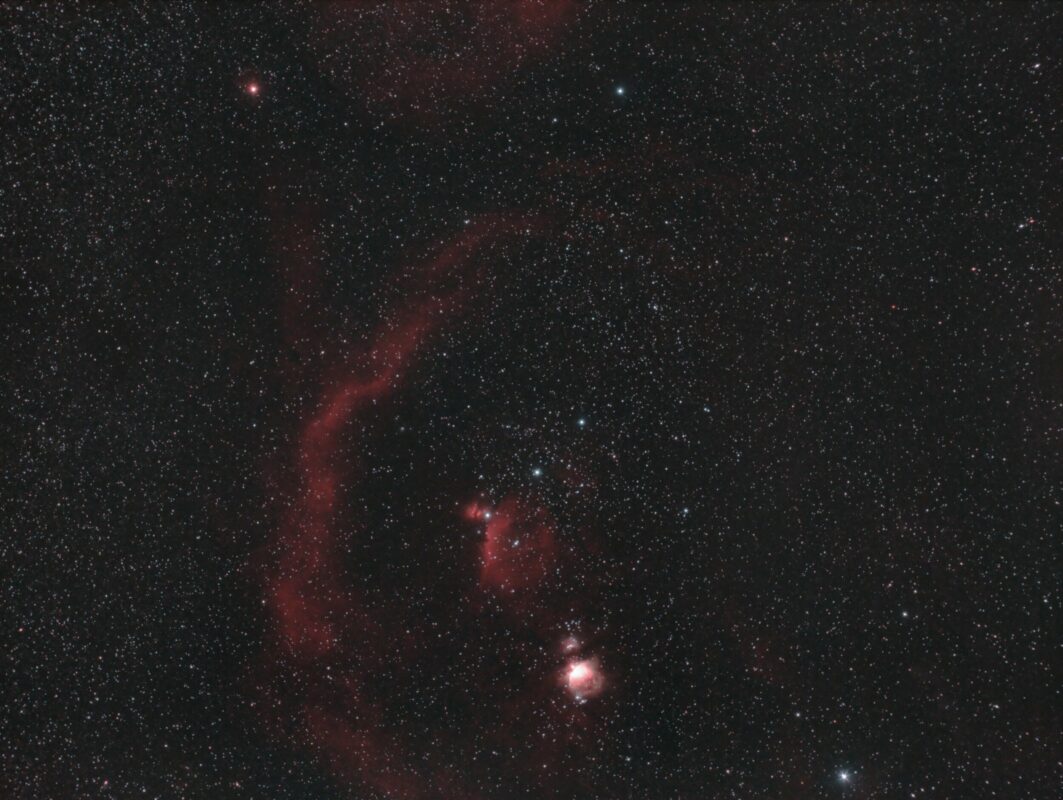
The Orion Nebula (M42) is arguably one of the most recognisable deep sky objects in the night sky, sitting in the most famous constellation of Orion. This diffuse nebula is a firm favourite for astrophotographers for many reasons. A wide-field shot of M42 will allow you to frame it with Orion’s belt, or with the Flame Nebula, Horsehead Nebula, Running Man Nebula and Barnard’s Loop.
It’s also visible to the naked eye, making it easy to frame up if you don’t have a Go-To mount, which is ideal for beginners. There are so many reasons to love this nebula!
M42 is a very interesting place in the night sky. It’s a stellar nursery where new stars are being born! At less than 1500 light years away, the Orion Nebula is the closest large star forming location to Earth – a truly fascinating place!
Checkout my video below where I capture the Orion Nebula using the Sky-Watcher Star Adventurer
As you can see from the above video, capturing the Orion Nebula doesn’t need observatory grade astrophotography equipment. Just a basic star tracker, a cheap telescope and DSLR will do the job.
Since recording that video, I have gone on to image the Orion Nebula many times, with each iteration improving on the last. It’s great to look back at older images to see just how far you’ve progressed in this hobby.
Orion Nebula Info
Location: Orion Constellation
Object Type: Reflection/emission nebula
Notable Features: Trapezium cluster
Distance from Earth: 1344 light years
Object Size: 24 light years across
Magnitude: 4.0
Location & How to Find
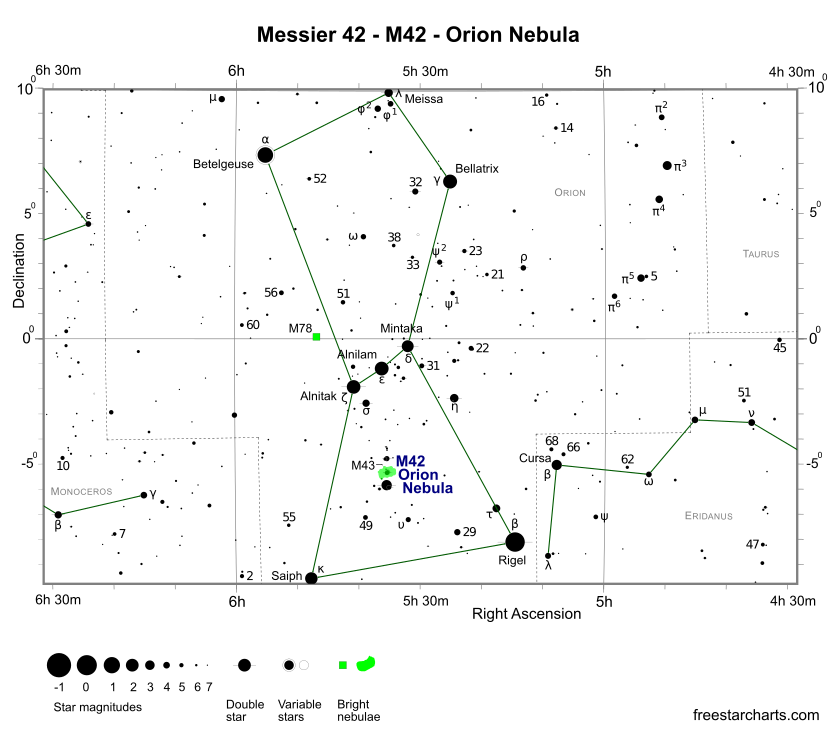
The Orion Nebula is located just south of the infamous Orion’s Belt. M42 is visible with the naked eye, which is why it’s such a popular target for beginners in astrophotography. Below is a screenshot from Stellarium showing the location of M42 within the box. The constellation of Orion is a winter constellation in the Northern Hemisphere and is best seen between the months of December-February.


Astrophotography
DSLR Settings
Okay, so now you’ve got M42 framed up, you’ll need to set the correct camera settings. These are the settings that I used on my modified Canon 650D DSLR. The Orion Nebula is a great astrophotography target no matter what imaging equipment you have.
- Camera Manual mode
- ISO 800
- Exposure 2 minutes
- White balance Daylight
I used my Sky-Watcher Evostar 72ED DS-Pro to capture this celestial beauty but if you’re using a camera lens, I recommend using f/2.8 or f/3.5 if your lens doesn’t open up to f/2.8. If you have a lens that opens up to f/1.8 then you may find that stopping it down produces better results. This is so your camera sensor can take in as much light as possible, which will reveal the finer details in the Orion Nebula in post-processing.
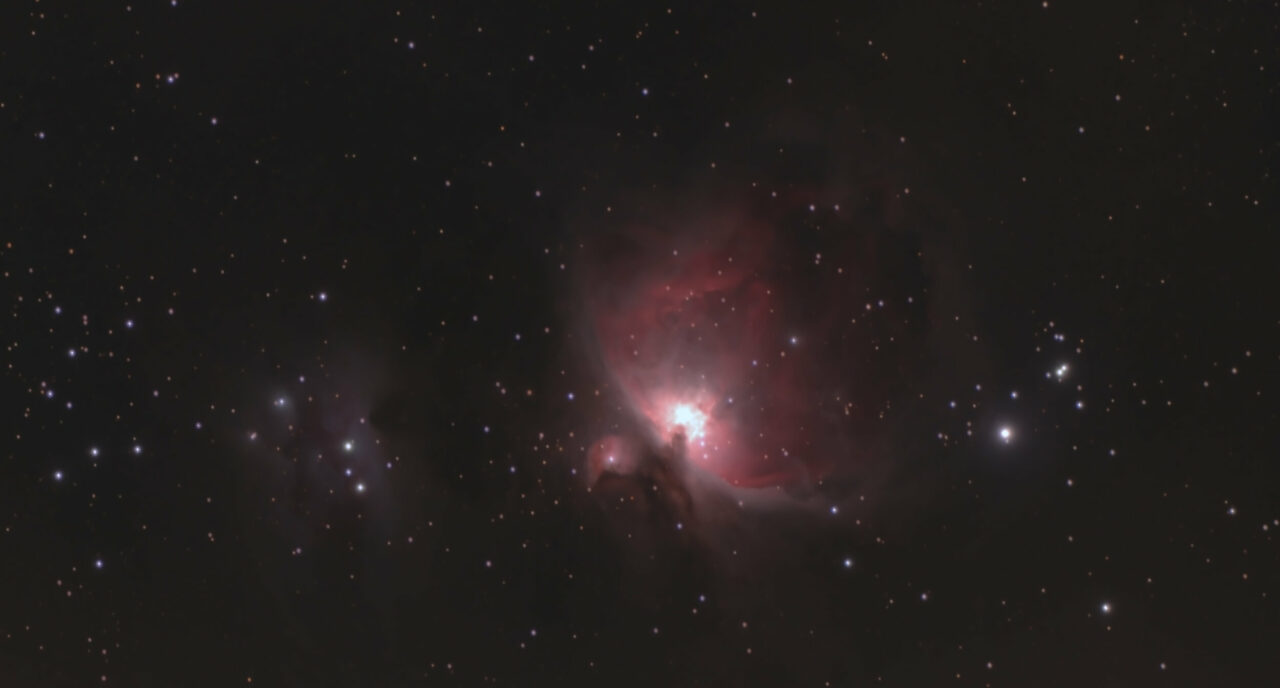
This image was the first that I took after I got my DSLR astro-modified. It’s not the best ever image of the Orion Nebula, but for 1 hour of data and 1 minute exposures, I was really happy with it! The image consists of:
- 60x 1 minute exposures
- ISO800
- 30 flat frames
- 50 bias frames
- Stacked in DeepSkyStacker
- Processed in Photoshop
The above image is the “out of the scope” field of view and hasn’t been cropped. As you can see, it’s a nice wide field of view and includes the Running Man Nebula just to the left of the Orion Nebula. The telescope I used was the Sky-Watcher Evostar 72ED DS-Pro and you can read my full review of this telescope here.
Astronomy Camera Settings
My astronomy camera is a ZWO ASI 533MC Pro. I absolutely love this camera, you can read my full review of it here.
- Gain: 100. This is Unity Gain for my camera, which I would always recommend using.
- Offset: 30. This setting works well for my sky conditions and the filters I use. I recommend starting here but you may need to increase it to 40 or 50 depending on your conditions.
- Temperature: I often image at -10C, or if it’s really cold -15C. The lower the temperature the better but anything below 0C will be fine.
- Exposure Time: A mix of 3 minutes and 15 seconds. I take different exposure lengths to blend in the core of the nebula in post-processing. The core is so bright that long exposures blow it out, but they’re also needed for the surrounding nebulosity. Blending shorter exposures with your longer exposures in post-processing means the core can be more easily controlled.
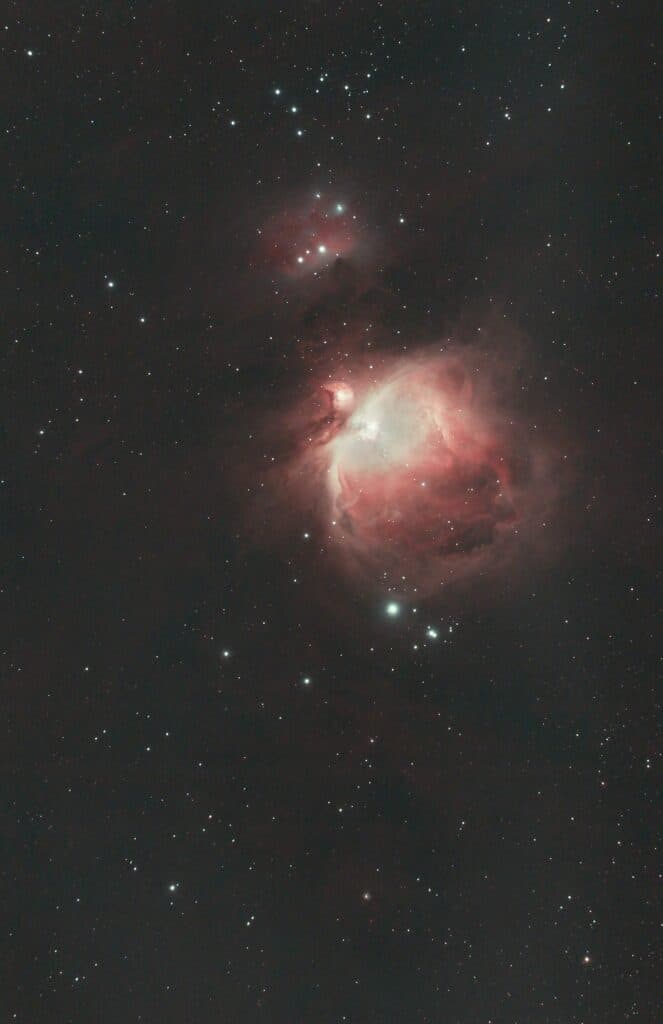
Image Details
Exposure Time: 2 minutes exposures & 15 seconds exposures blended
Mode: Manual/Bulb
ISO: 800
White Balance: Daylight
Visual
For the observers among us, the Orion Nebula is a great target with binoculars. At Magnitude 4.0, even under light polluted skies M42 will certainly not disappoint, be sure to observe it in this way if you haven’t had the pleasure of observing this celestial nursery before, you won’t regret it!
You can easily find the Orion Nebula with binoculars or a telescope and eyepiece. Start by pointing at the lower star of Orion’s Belt, Alnitak. From there, move your finger South West and you will notice a bright looking star – that’s the Orion Nebula.
What Equipment to use?
Honestly, with the Orion Nebula, any equipment will do. You can even take a photo of it using a smartphone held up to the eyepiece of a telescope! This of course won’t be a patch on dedicated deep sky astrophotography equipment, but it’s good to know it’s possible.
I have imaged Orion using a 50mm lens and a 3-inch refractor telescope. Both provide completely different views of the Orion Nebula, each with its pros and cons.
A widefield shot of Orion, using a 14mm or 50mm lens, will give you a view of the entire Orion constellation! That means you’ll also be capturing deep sky objects such as:
- Barnards Loop
- Horsehead Nebula
- Flame Nebula
- Running Man Nebula
- M78
If you’re using a 14mm or similar lens, you could even capture the Rosette Nebula in the neighbouring constellation of Monoceros!
If you have longer focal length equipment then you will be able to crop in much more closely to the Orion Nebula. The cropped in images shared on this post have all been captured using a small 3-inch refractor telescope.
You can input your imaging equipment into planetary software such as Stellarium to get the field of view for your equipment, which helps to frame it up before you start imaging.
Best Time to Observe
Orion is a winter constellation and will appear due South at about midnight in December and will reach due South approximately 2 hours before that each month after, before finally going out of view as Spring arrives. The best time to observe or image Orion from my location in the UK is towards the end of January-Early February as it’s nice and high in the South East at around 8pm, giving me several hours of imaging time before it sets in the early hours.
For many, including me, the Orion Nebula will be the first ever deep sky object you see or photograph and I think that’s what makes it so special. It doesn’t matter if you’re producing award winning images, or your first ever image, the Orion Nebula will reward you no matter your equipment or ability.
Even if I take a 3 second image on my smartphone, I can make out the Orion Nebula. Okay, yes it’s just a tiny smudge on the screen, but I can see it and I know it’s there. It’s an amazing thing that the tiny camera on a smartphone held up to the sky for just 3 seconds can produce a result! Imagine what you’ll be able to achieve with your own imaging gear!
It’s always best to image deep sky objects during new moon where possible, but when that’s not possible, using narrowband filters will cut out a lot of the light pollution caused by the moon and only pull in the detail you want. It’s also always best to image a target when it’s higher in the sky due to atmospheric disturbance.
Astrophotography Tips & Tricks
I always return to imaging the Orion Nebula every year, whether that be zoomed in with my telescope, a wide-field shot with a camera lens, or just simply looking at it through an eyepiece. I’ve learned a lot about this deep sky object over the years and want to share some of my top tips with you.
- Don’t over expose your images. The Orion Nebula is bright, very bright in fact. It’s one of the few deep sky objects visible to the naked eye. It’s therefore easy to over expose and blow out the nebula completely. Limit your exposures to 3 minutes max, see how your individual subs look and adjust from there.
- Take a mixture of exposure times. I’ve already mentioned blending shorter exposures with your longer exposures. This is really key to not blow out the trapezium in the core of the nebula. You will need to make 2 separate stacks and blend in post-processing – I go into more detail about this below.
- Use an equatorial mount. Using a tracking mount, even a basic star tracker such as the Sky-Watcher Star Adventurer, will yield far greater results than just holding a camera up to the eyepiece of a telescope, or just using a camera sat on a static tripod. That’s not to say you can’t image it without a tracking mount, but your results will be limited.
- Use a light pollution filter. Using a filter will block out the glow of the sky from your local light pollution if you live under bright skies. However, if you live in a Bortle 4 or darker area, I would recommend imaging without a filter. Filters such as the Optolong L-eNhance or Optolong L-eXtreme can produce an overly red image like mine above. If you’re wanting to use a filter on this particular on the Orion Nebula, I would recommend using something like the Optolong L-Pro which will let more natural RGB light through, but block out sky glow.
Image Processing
While the Orion Nebula is one of the best deep sky objects to image as a beginner, processing it after image acquisition can actually be more complex than other deep sky objects, particularly if blending shorter exposures with longer exposures.
If you’re blending exposure times together, you will want to stack these separately in stacking software such as DeepSkyStacker, and then blend them using layers in Adobe Photoshop or other post-processing software such as PixInsight. I haven’t yet done a video tutorial for this, but when I do I will upload it here.
Essentially, you will process the two images separately, and then copy & paste the shorter exposure image on top of the longer exposure image, adjusting the transparency as necessary. This will mean the core won’t be so bright and will give a more natural look to your final image.
Interesting Facts
- M42 is energised by stars in its trapezium centre, the radiation emitted from these stars heats up the surrounding gas making it glow, although these stars are very hard to make out in images.
- M42 is approximately 25 light years across, a fact that can be difficult to appreciate when it appears fairly small in the telescope FOV, but travelling at the speed of light, it would take 25 years to travel across the Orion Nebula!
- M42 is the closest star forming region to Earth!
- Its mass is approximately 2000 times that of our Sun.
- It was discovered in 1610 by French astronomer Nicolas-Claude Fabri de Peiresc.